Managing Users in APG
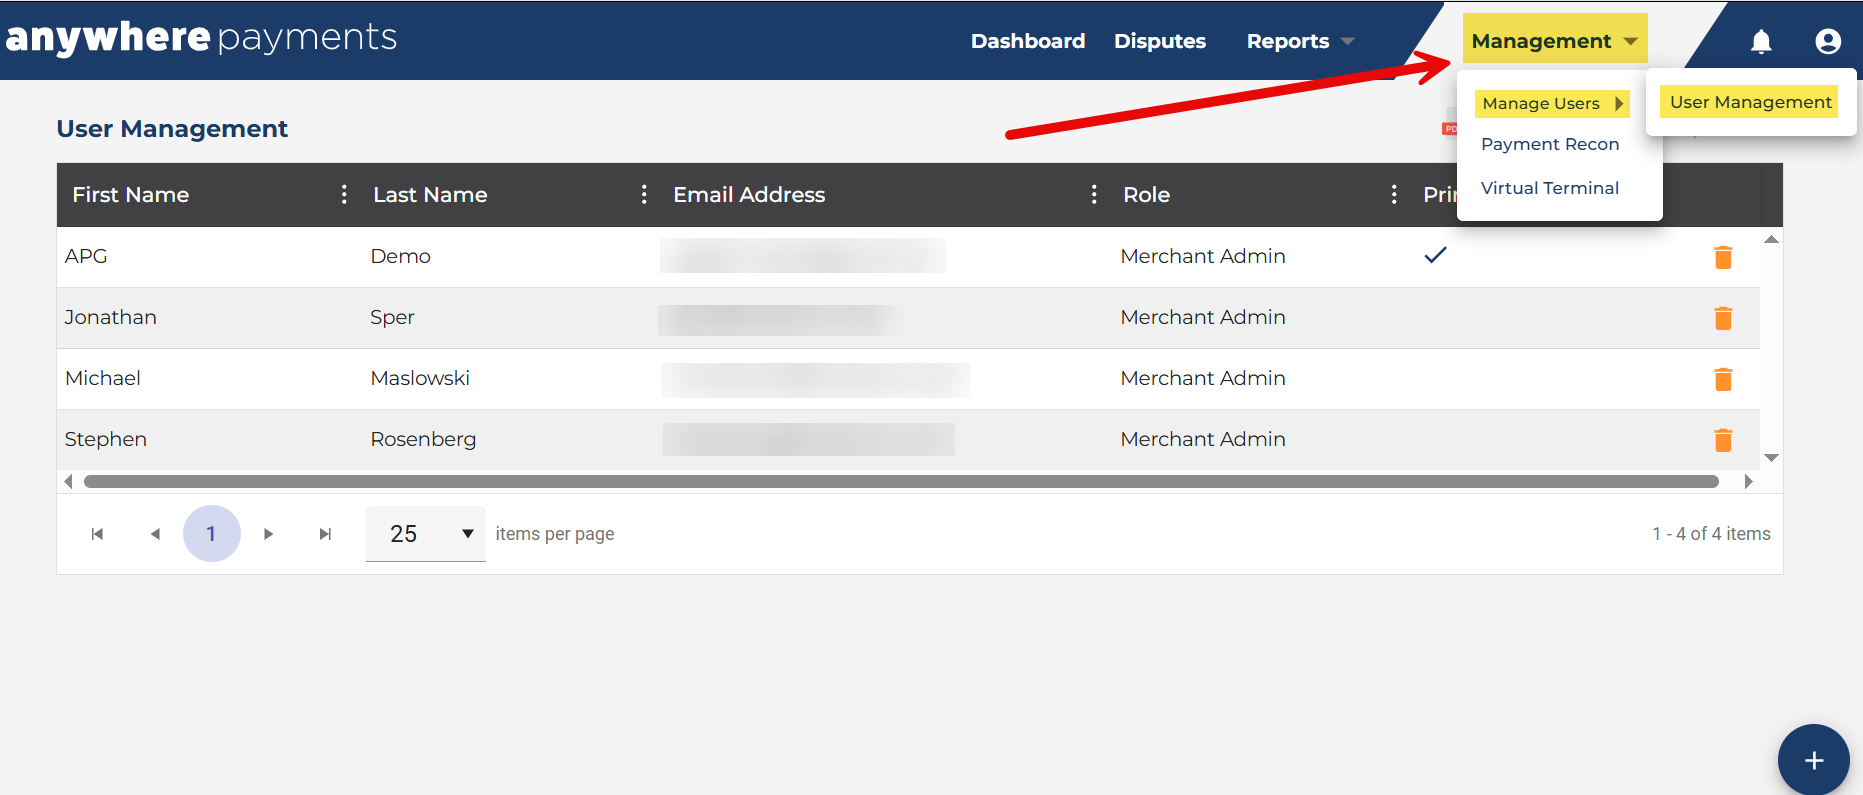
Once your instance of Anywhere Payment Gateway (APG) is approved, the Management tab > User Management menu option will become available. In this area, new users can be created and given permission to perform gateway processing-related tasks.
To manage users in APG, at the top right corner of the screen, click Management > Manage Users > User Management. The User Management list will appear, showing users in your instance of APG.
Adding a User
In the User Management list, click the blue + icon at the bottom right corner of the page.
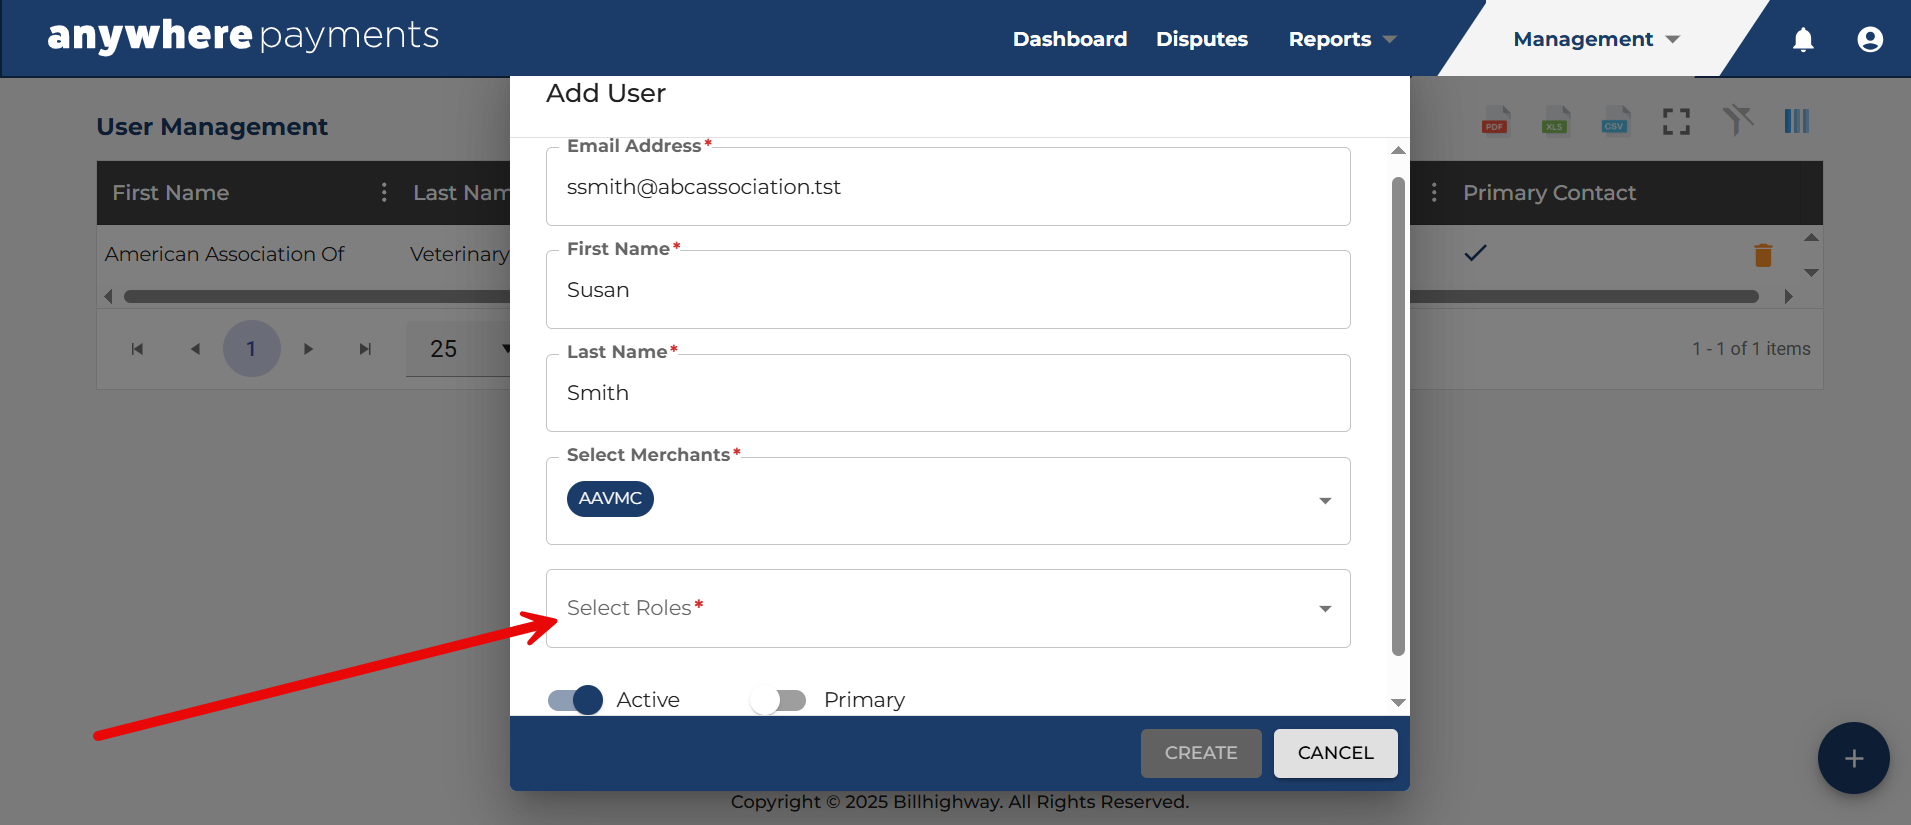
In the Add User form, complete the required fields.
-
Email Address
-
First Name
-
Last Name
-
Select Merchants: Super admins can choose from a list many merchants—click the check-box by all the user should have access to.
-
Select Roles: A user's role determines which features and areas they can access. Choose the user's roles from this drop-down.
-
Active: This toggle allows you to quickly disable or enable a user's access.
-
Primary: This toggle allows you to label a specific user as the primary contact.
Note: New users receive an email with a temporary password.
Role Types in APG
Below is a general list of roles in APG and their descriptions.
| Role Name | Description |
| Group Merchant Admin | Multiple merchant access. |
| Merchant Admin | Full access; no restriction. |
| Merchant Dispute User | Full Dispute Management functionality access. |
| Merchant Reporting User | Can run/view reports. |
| Merchant Virtual Terminal | Has access to the Virtual Terminal tab for manual payments and voids. |
| Payment Recon - Exceptions Only | This role will receive an email when there are payment reconciliation exception(s). |
| Payment Recon Notifications | These users will receive all payment reconciliation email notifications. |
Editing Existing Users
In the User Management list, click the user name. All fields listed above can be edited. Edit a user's roles under the Select Roles drop-down or activate / deactivate their accounting using the Active toggle.


