Creating Web Pages: Using Custom Query Content
Web pages can be created to show the result set of any query. This can be used, for example, to create additional member directories (if necessary), additional committee directories, a custom online store, and more.
The only limit is the data a query can pull.
Three steps are necessary to set up a page like this:
-
Create the query. This is the query whose result set should display on the web page.
-
Create the web page. Create the web page and link it to the query.
-
Test. Verify that the query result set displays as you’d like. Edit the query and web page as necessary.
Step 1: Create the Query
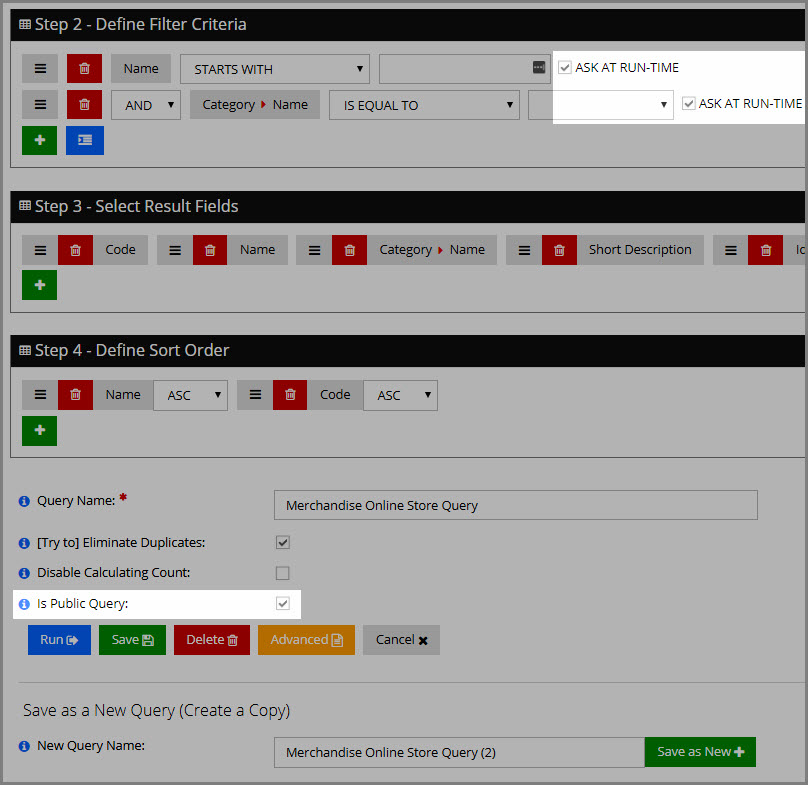
Make it Unique
Begin by creating the query to display on the web page. When starting from an existing query, it’s recommended to “save as new” so the web page uses its own unique query. You may want to make changes to the way the web page query criteria or result set works so that it’s optimal for use on the web page. These changes might be less desirable or useful if the same query is used by staff.
Example: The system query, “Merchandise Search,” displays the merchandise list to staff when the Products App > Merchandise Feature, is clicked. If I use this query to show a list of merchandise on a web page, I should “save as new” so that my web page-specific query settings do not impact the staff view.

Include Search Fields?
When a member views the web page, the query can run in one of two ways:
-
Query search fields display, allowing the member to specify the results they want.
-
Query search fields do NOT display, and the member sees all possible results.
If scenario 1 is chosen, keep in mind that search criteria fields are visible to members and only those useful to them should be available (not, for example, the “product ID” field). To allow members to use search criteria fields, ensure that fields are flagged to “ask at run-time,” and the “Is Public Query” check-box is checked.
Choosing Results to Display
If you want to display a certain query field in the web page, the fields to display must be included as a result field in the query setup.
If the field is not included in the query setup as a result field (in the Query Builder, “Step 3 – Select Result Fields”) it will not appear on the web page. E.g., to include a record image on the web page, “Image” must be included in the result fields list.

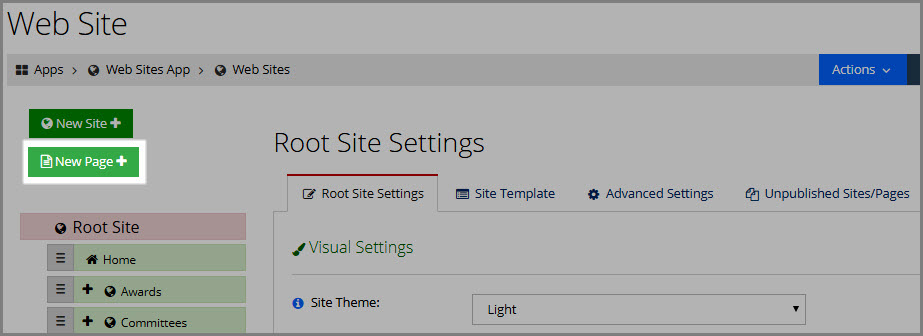
Step 2: Setting up the Web Page
In the Web Sites app, add a new web page. The new page can be added on the top level of the pages list or within a site.
-
In creating the new page, enter the page Name, URL, Menu Title, and Page & Browser Title under the Page Settings tab.
-
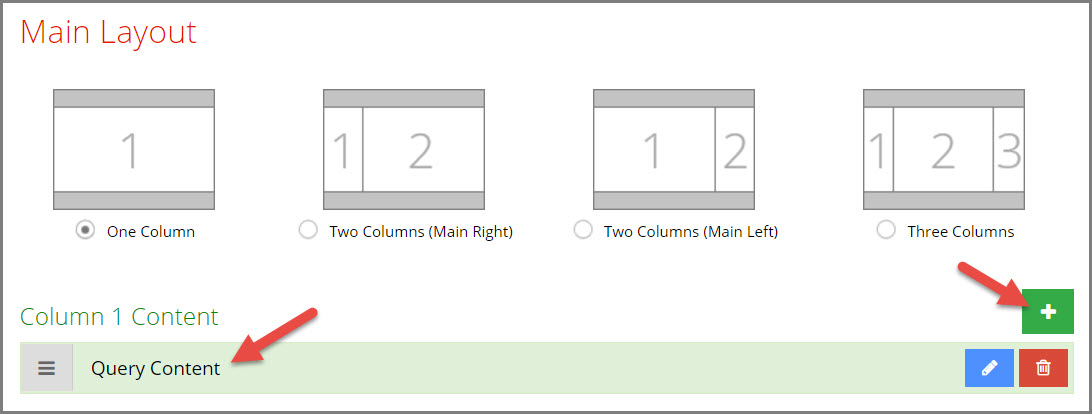
Select Page Content. Under Main Layout, add the Query Content content item.
-
In the content item setup page, select Query Content in the Type drop-down field.
-
In Query, select the query created in Step 2, above.
-
For members to be able to run the query search, leave Do Not Allow Search deselected.
-
In Item Template HTML, include the fields you want to have appear on the page.
-
These are the results fields specified when building your query.
-
Surround these with curly brackets: {{ }}.
-
Do not include spaces in field names. A field name that appears as First Name in the query builder should be {{FirstName}} in the query content item creator. Do preserve the capitalization of the separate words in the field name.
-
You can include your own HTML, if you like. Click the Edit in HTML button to open the HTML editor. In the example below, the Edit in HTML button has been clicked, showing the view in edit in HTML mode.
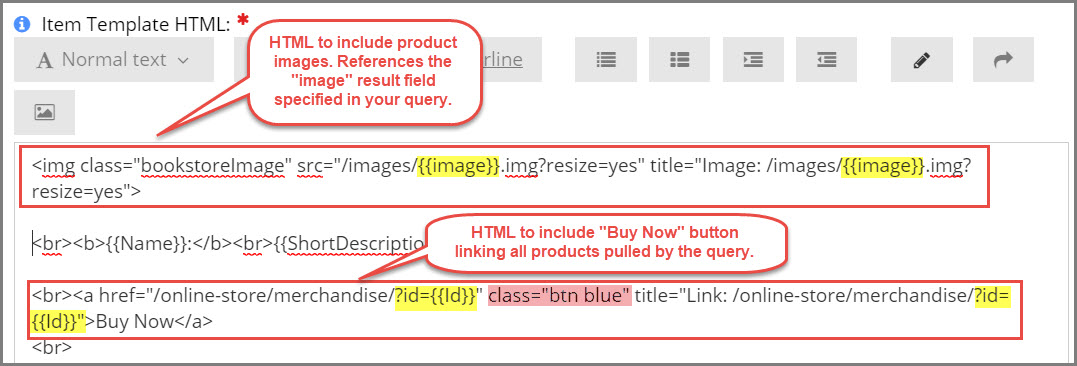
This example shows the setup for a custom online store page that displays the product image, as well as a “Buy Now” button, allowing the user to click and proceed immediately to purchase the desired product.
While you can easily set up a very usable page with no knowledge of HTML, there are many things that you can do with just a little knowledge (such as including the button described in the example above).
Step 3: Test
Once the page content is configured and saved, test to verify that the page displays and works as intended.
In the Web Page Settings, click the Preview Draft Page button. This opens the page you created in a new browser tab, allowing you to test its functionality.
-
Query results: Ensure the query returns the result set required, with no “duplicate” results.
-
Images: If images are included, do all results have an image to display? Has the “image ID” field been included in the result set and incorporated in the HTML setup?
-
Button functionality: If any buttons have been included, ensure that these operate correctly.
-
Other settings: Because this web page setup is very customizable, there may be other, extraordinary settings that you have created. Be sure to test these to ensure that the member experience with your page is positive.
Once the page has been tested, return to the web page creation page and click the Publish Page button.