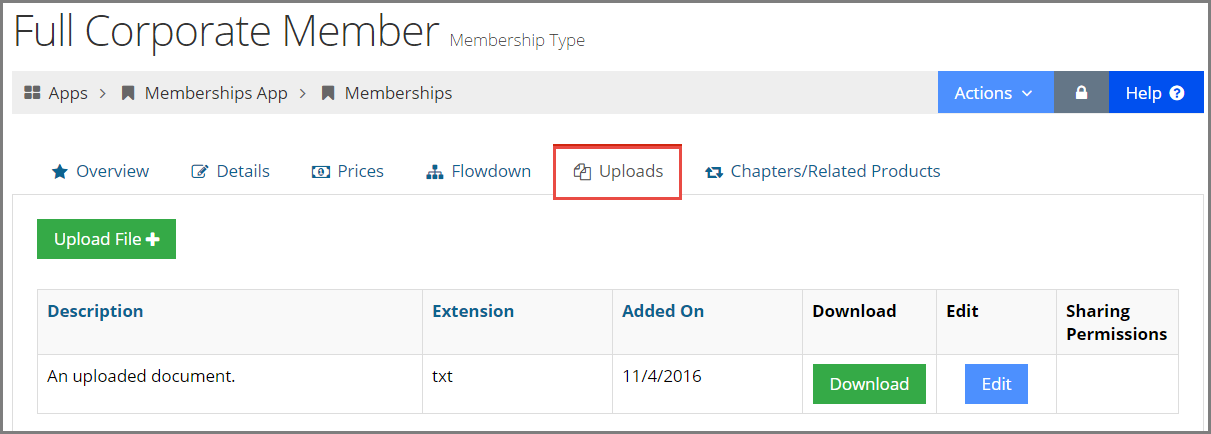
Uploading a File to a Product Record
When a file is uploaded to a product record, once the product is purchased, the associated file becomes available to the customer who purchased that product.
Example: Event registrants receive access to a PDF of the event program book.
-
Open the Product Record.
-
Click the Uploads tab.
-
Click the Upload button. A drop down menu expands with options to upload a file or to enter the URL of a file that is already uploaded in the system.
-
If selecting Upload File, the File Upload window will appear.
-
Click Browse next to the Select new file to upload field.
-
Using the dialog window, locate the file on your drive to upload and click Open.
-
Optionally, select the file's save location within the Upload Center using the Put in folder menu.
-
If desired, enter a brief Title for the file.
-
If applicable, select the file's Document type from the dropdown menu.
-
Choose a specific Description of the file's contents. This field automatically populates with the uploaded file's name, but can be edited.
-
Click the Upload File button.
-
-
If selecting Enter File Url, the Add File Url window will appear.
-
Enter the Url leading to the document. This will generally be your site's domain followed by the file's Full Path.
-
Optionally, give the file a Title.
-
Enter a specific Description of the file's contents.
-
-
Title vs. Description
These two fields can serve a very similar purpose, though a Description is required while a Title is optional. To help differentiate their use, let's take a file of presentation slides as an example:
The Title might give a high-level overview of the file's purpose, such as the presenter's name, date presented, and/or the presentation topic.
Whereas the Description might provide a more granular sense of the file's contents, such as the titles of each slide.
Once the document has been uploaded, it will appear in under the Uploads tab, in the uploaded document table. Click the View button to display the document and to access the Download button, which allows you to download the file to your drive. Click Edit to overwrite the existing file with a new file, update the file Description, or delete the file from the Product Record.
Managing Sharing Permissions
Certain products—including Event, Session, and Course Records—in re:Members AMS allow staff to manage the sharing permissions for documents uploaded to that product record.
The sharing permissions allow staff to indicate the user type(s) that should have access to the uploaded document. Sharing permission options differ slightly between products (depending on the product type), but in essence allow staff to limit or open access to a file based on the customer type or status.
To set sharing permissions:
-
Click the Uploads tab.
-
Check the Download box next to each user type that should have access to the file. If Public is checked, then all other user types will automatically check as well. If no types are checked, the file will only be available to staff.
Note: If the Permissions button does not appear, permission settings are not possible for that record type.
In the example below, the document sharing permissions for a document uploaded to an event are shown. For events, options can be limited to speakers, registrants, or all public users.
File Uploads Throughout the System
Many records in re:Members AMS offer a Documents or an Uploads tab, which enables staff and/or customers to upload a file associated with that record.
Record types that accept an uploaded file include:
| Customer Records | Product Records | ||
| • Individuals | • Memberships | • Merchandise | |
| • Organizations | • Events | • Publications | |
| • Chapters | • Sessions |
• Certification Applications |
|
| • Exhibits | • Courses | ||
| Committee Records | • Sponsorships | • Exams | |
| • Committees | • Subscriptions |
• Award Nominations* (process differs) |
|


