Generating a List of Direct Links
The following instructions can be used to create a list of direct links which can be shared with customers.
For example, various individuals can manage on behalf of their specific organizations, and this process can be used to create a list of URLs linking to a certain individual’s specific organization. These links can then be shared with the appropriate individuals.
The process is as follows:
-
identify the URL to use in creating the direct links,
-
run a query pulling the organization records and their “Customer ID”s,
-
export these query results into an Excel spreadsheet,
-
insert the designated formula into the Excel spreadsheet, and
-
generate direct links using the formula + data in the Excel spreadsheet.
Identify the Core URL
-
Determine the URL you want to use when generating direct URLs.
Example scenario: Impersonate a user with permission to manage for their organization and navigate to the Manage My Organization screen. This URL points directly to a specific organization Customer ID.
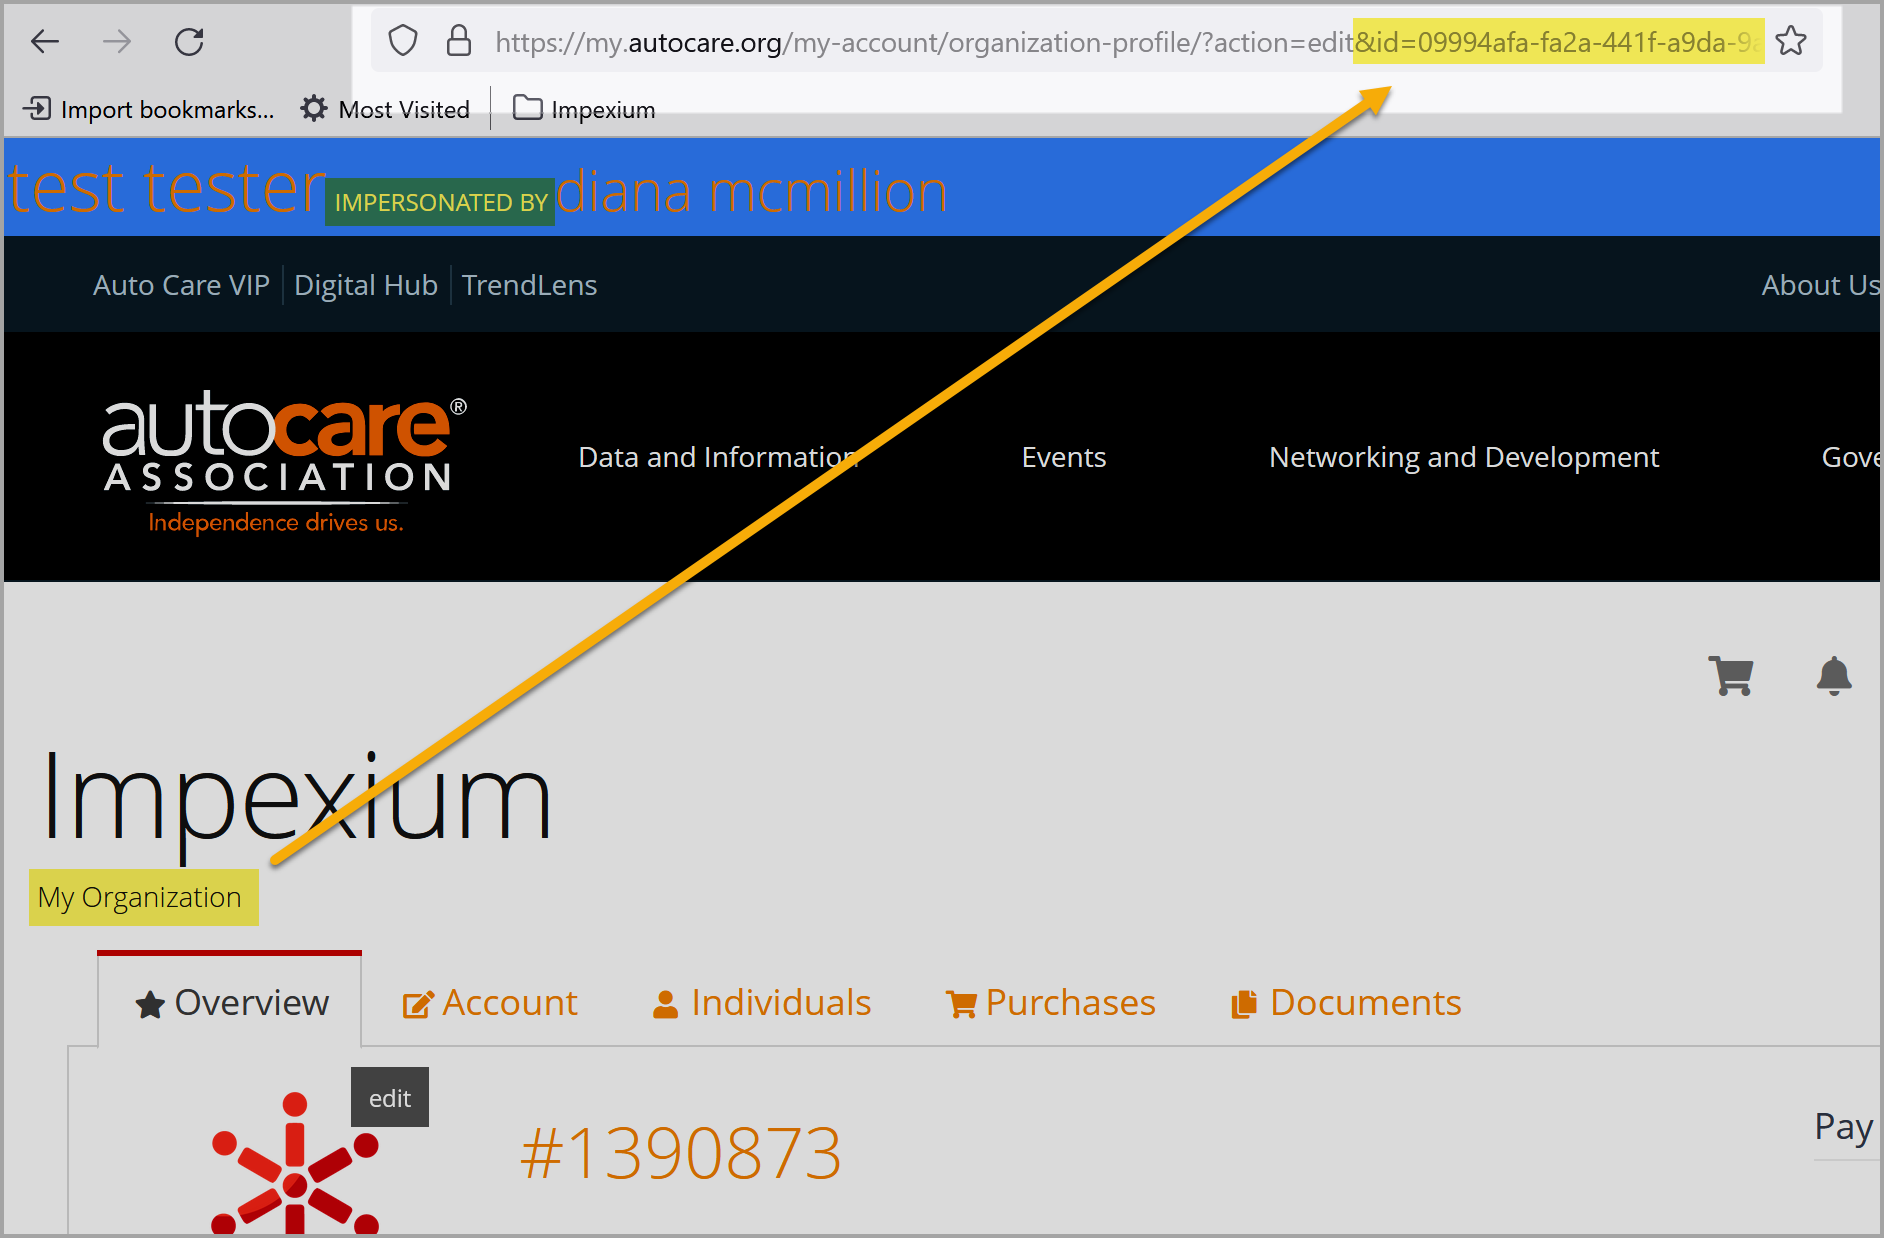
In the example above, we impersonate a test user who can manage for their organization. The URL in the example above:
https://my.domain.org/my-account/organization-profile/?action=edit&id=[UNIQUE CUSTOMER ID]
takes the user to the Manage My Organization page, and the ID at the end of the URL identifies exactly which organization displays. Without this ID, the page cannot display properly. We will use this URL in generating direct links for this example.
-
If you like, copy and paste the URL somewhere (such as Notepad) for the time being, but do not include a specific Customer ID. The end of the URL should stop at &id=.
https://my.domain.org/my-account/organization-profile/?action=edit&id=
Exporting the List of Organization Records to Excel
-
Next, create or run an existing query pulling a list of organizations, including (at a minimum) the Customer ID for each organization. This query can be further formatted as necessary, but the Customer ID must be included in the results.

-
On the query results page, click the Actions drop-down and Export to Excel.
Implement Formula in Excel to Create URLs
-
Open the exported spreadsheet in Excel.
-
Right-click the header of column A and select “Insert” to insert a new, blank, column.
-
In column A, cell 2, paste the URL obtained in Step 1. (Do not include a customer ID in this URL.)

-
With cell A2 selected,
-
click the Formula Bar in Excel to edit the contents of cell A2. (Do not edit cell A2 directly.)
-
Add an equals sign and quotation marks at the beginning of the URL. At the end of the URL, add quotation marks, an ampersand and the cell that includes the Customer ID for this customer.
For example:
=”https://my.autocare.org/my-account/organization-profile/?action=edit&id=” & [CELL CONTAINING CUSTOMER ID]
In the clip below, the cell containing the Customer ID is D2, so the URL is:
=”https://my.autocare.org/my-account/organization-profile/?action=edit&id=” & D2
Note: In formatting the contents of the cell this way, we are telling Excel to strictly display the URL as typed (accomplished by the equals sign and by including the URL within quotes), immediately followed by whatever is in column D in the same row (accomplished by adding the ampersand + the name of the cell…in this case “D2”).
-
Press Enter. Excel automatically pulls the value from the Customer ID cell you identified and creates a URL using that customer ID.
Cell A2 should now display a formula that includes the URL you identified in Step 1 combined with the Customer ID in the Excel spreadsheet.
Next, we’ll copy the formula from this cell into all subsequent cells, simultaneously pulling the data from the column containing the Customer ID. The clip below illustrates these steps.
-
-
Hover your cursor at the bottom corner of cell A2 until the cursor resembles a “plus” sign: +
-
While the cursor looks like this, click, and drag down the length of column A. Excel automatically generates a URL with the appropriate customer ID in each cell.
-