Using the Payment Import Tool
Payments can be imported into the system using the Payment Import Tool. For information on enabling Payment Import on your system, please contact re:Members AMS Client Success.
-
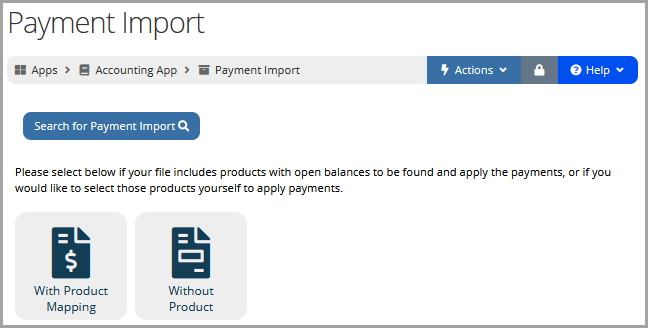
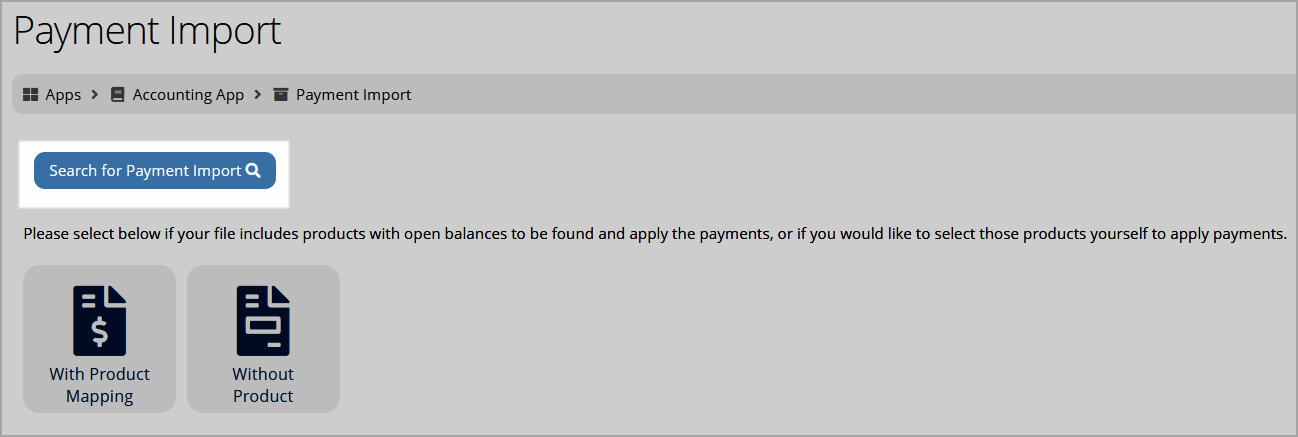
Navigate to the Accounting App > Payment Import. Payment Import displays two sections:
-
With Product Mapping: The file being imported will map payments to specific products identified in the Payment Import form.
-
Without Product: The file being imported does not contain product information. Rather, staff can select whether they are importing membership or subscription order payments via the payment import form itself.
-
Note: The Excel spreadsheet being uploaded must display a data label for each data point in row 1. For example, column A, row 1 could contain the text "Record Number," and column B, row 1 contain the text "Payment Date," and so on.
Subsequent rows must contain the data itself. For example, if a payment dated 12/01/2020 for record number 1000 is included in the import, column A, row 2 could contain the value "1000" followed by the value "12/01/2020" in column B, row 2, and so on, until all necessary data points are provided.
Note: Only one row in the Excel spreadsheet should be used per check number. For example, if a customer has two unpaid invoices--one for $100 and another for $30--and they submit a single check for both items amounting to $130, the Excel spreadsheet should contain only one row for that payment even though it will be applied to two invoices.
With Product Mapping
"With Product Mapping" tells the system to apply imported payments to unpaid transactions for specific products. The products to which payment should be applied are identified during the import process.
-
Click the With Product Mapping icon. The Payment Import page loads.
-
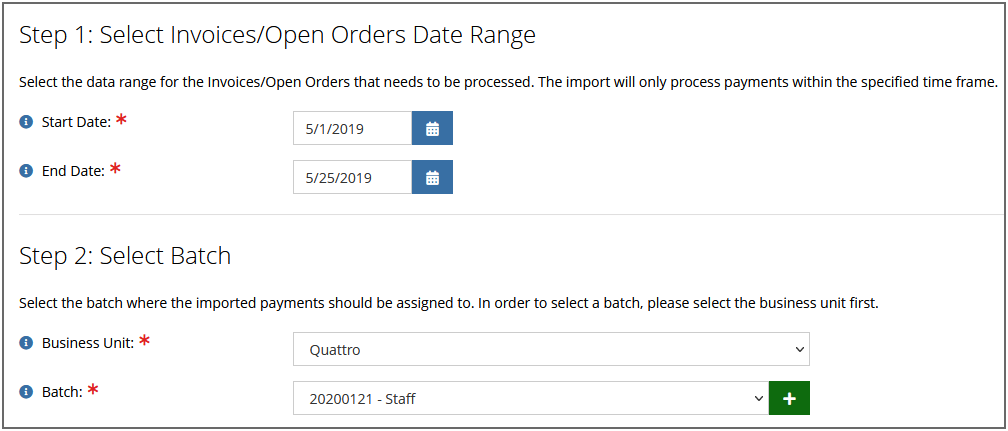
Specify the Start and End Date range of the orders and invoices to be included in this import.

Note: Selecting the Advanced Filter option will allow the selection of a From and To Term Expiration date, if necessary.
-
Select the necessary Business Unit. Once the business unit is selected, the Batch field appears.
-
In the Batch field, choose or add a new batch that will house the imported payments. Batches in this list are limited to those in the selected business unit.
-
In the Select Monthly or Biweekly Payment section, choose the Monthly Payment option to apply the full payment toward invoices and open orders.
-
To include invoices in the process, ensure that the Include Invoices check box is clicked. To apply payment to open orders only, leave this unchecked.
-
Locate the Select a payment file to upload field and click Browse to locate the file to be uploaded. The file must:
-
be an Excel spreadsheet file, and
-
contain only four of the five following possible fields:
-
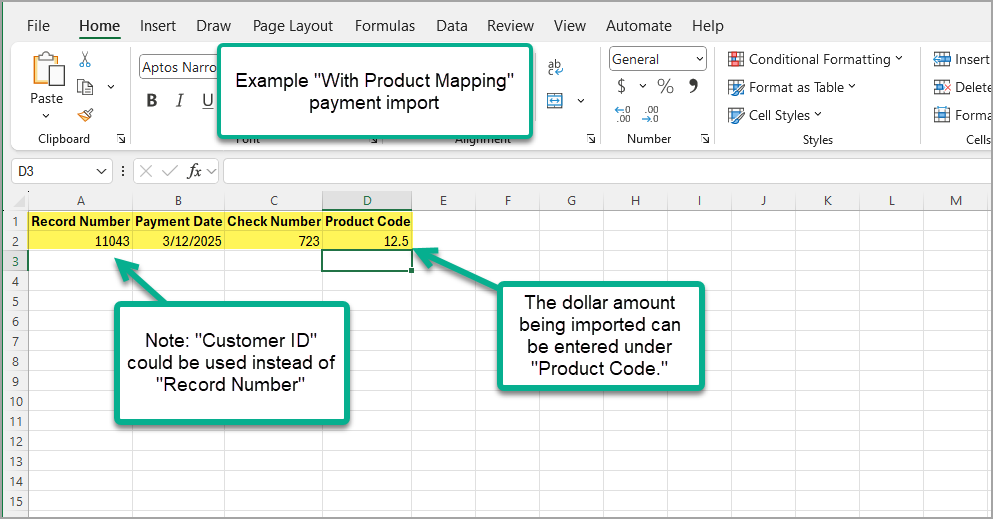
Record Number OR Customer ID:(Select ONE.) The customer Record Number is visible on the Customer Record > Overview tab. Customer ID is the unique record ID for a customer, visible when a Customer Record is accessed, and can be seen in the browser URL bar after the text "id=". Choose the value to use in your spreadsheet.
Important: Be consistent--do not include a mix of record number and customer ID's in the same spreadsheet. If using Record Number, ensure the Excel file includes the exact record number. For example, if the record number is "0000144121," ensure that Excel does not automatically remove the "0000."
-
Payment Date
-
Check Number
-
Product Code: Enter the column header "Product Code" in your spreadsheet. Enter the dollar amount to be imported in the Product Code column.
Important: Product codes do not need to be identified in the Excel spreadsheet. These will be identified in upcoming steps using the import form.
-
-
-
Once the file is selected, click the Upload File button.
-
After the file is uploaded, the data imported via the spreadsheet must be mapped to the corresponding fields in re:Members AMS.
For Product Code, use the quick lookup field to begin typing the codes of the products to which the imported payments should be applied.

-
Click the Import Payment button.
Without Product Mapping
"Without Product Mapping" indicates that specific product information is not included in the import.
-
Click the Without Product Mapping icon. The Payment Import page loads.
-
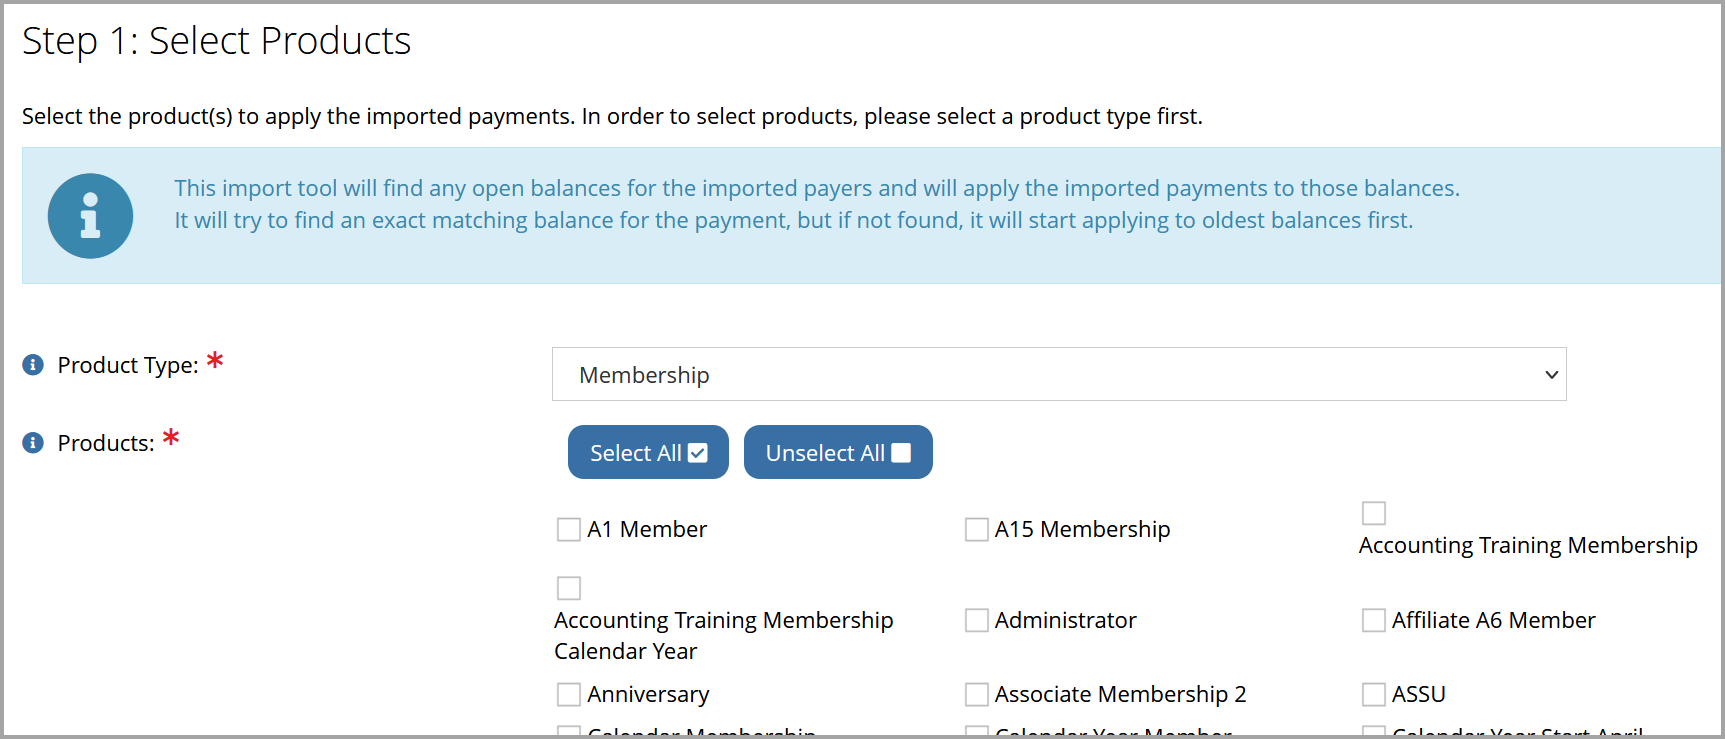
Use the Product Type field to select the product type for which payments are being imported: memberships or subscriptions.
-
Once the product type is selected, all products of that type will appear. Choose which ones to include in the process.
-
Select the necessary Business Unit. Once the business unit is selected, the Batch field appears.
-
In the Batch field, choose the batch that will house the imported payments. Batches in this list are limited to those in the selected business unit.
-
Locate the Select a payment file to upload field and click Browse to locate the file to be uploaded. The file must:
-
be an Excel spreadsheet file, and
-
contain the following fields:
-
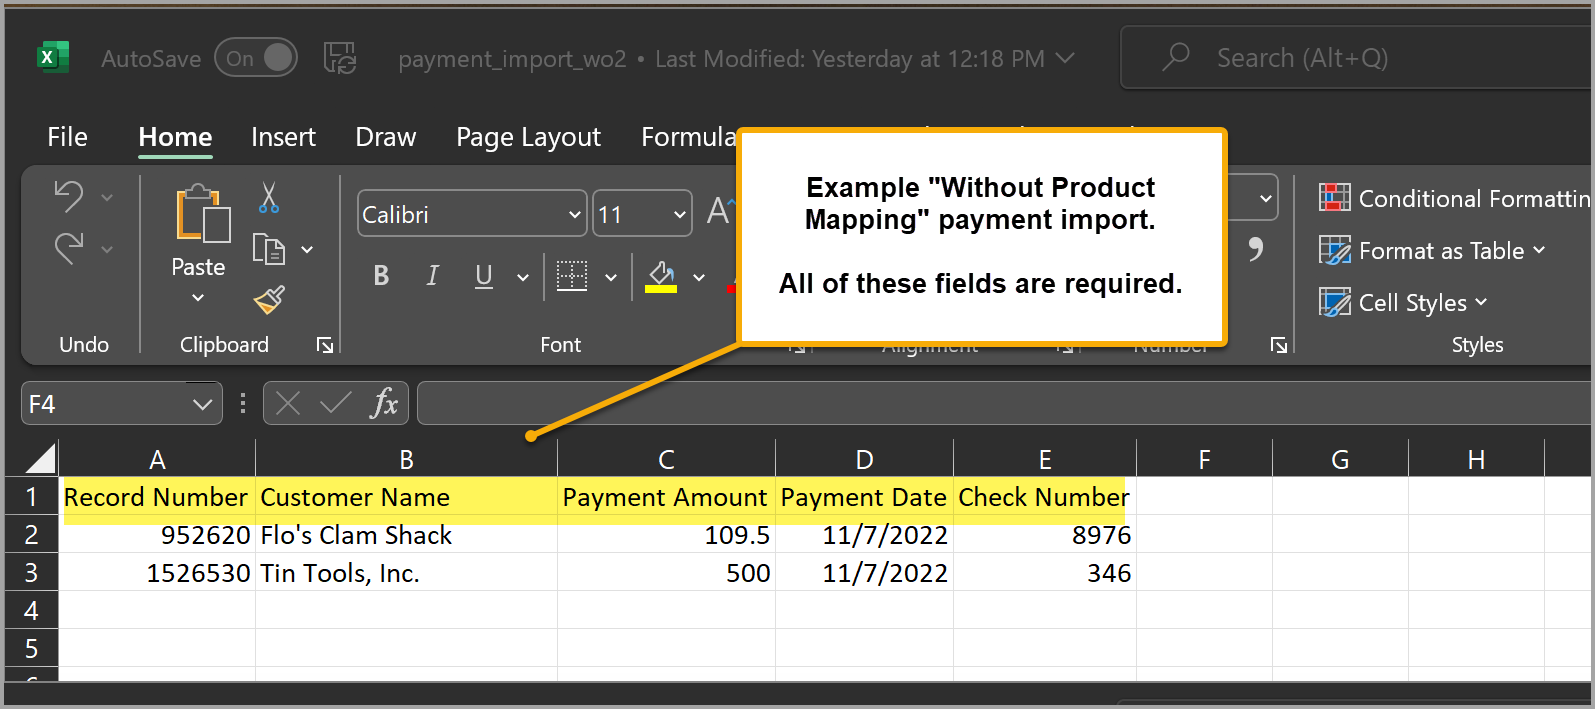
Record Number: The customer Record Number is visible on the Customer Record > Overview tab. Ensure that the Excel file includes the exact record number. For example, if the record number is "0000144121," ensure that Excel does not automatically remove the "0000."
-
Customer Name
-
Payment Amount
-
Payment Date
-
Check Number
-
-
-
Once the file is selected, click the Upload File button.
-
After the file is uploaded, the data imported via the spreadsheet must be mapped to the corresponding fields in re:Members AMS.
-
Click the Import Payment button.
Looking up Imported Payments
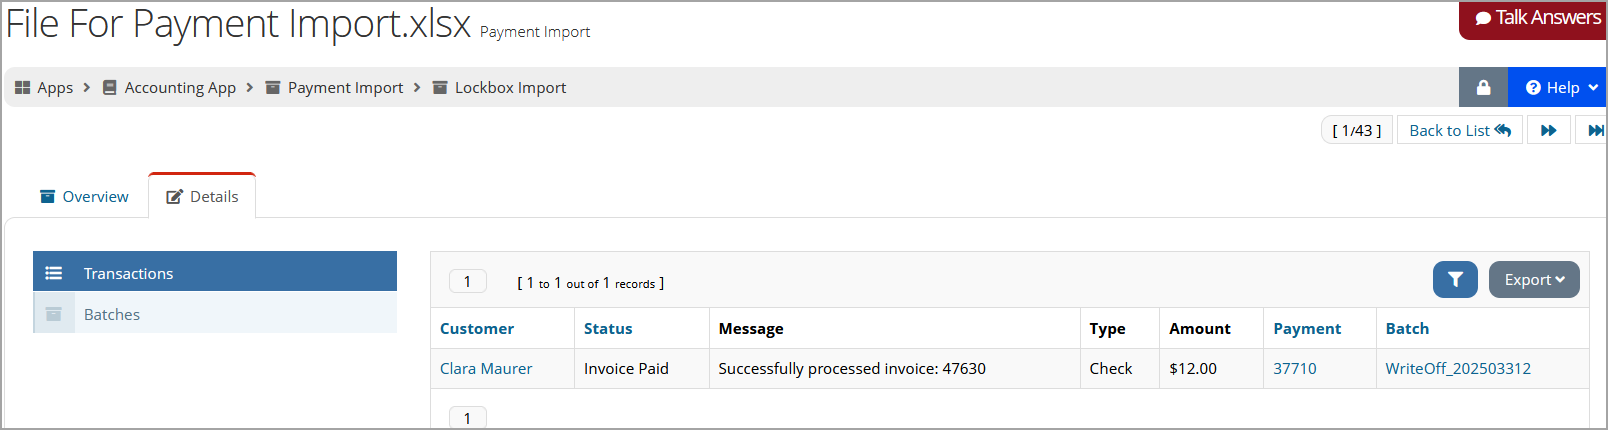
Once a set of payments has been imported, you can go to Accounting > Payment Imports and click Search for Payment Import to view the status of the import.
Instances of import are saved as separate records. Open the record to view the total amount imported as well as the invoices payment(s) were applied to. Any errors or failure to import will also appear on the profile.