Editing or Deleting an Auto Payment
A customer's scheduled automatic payments are accessible via the Customer Record > Purchases tab > Auto Payments menu option > Active Auto Payments tab.
Adding a New Payment Method
To add a new payment method to an existing item set for auto payment:
-
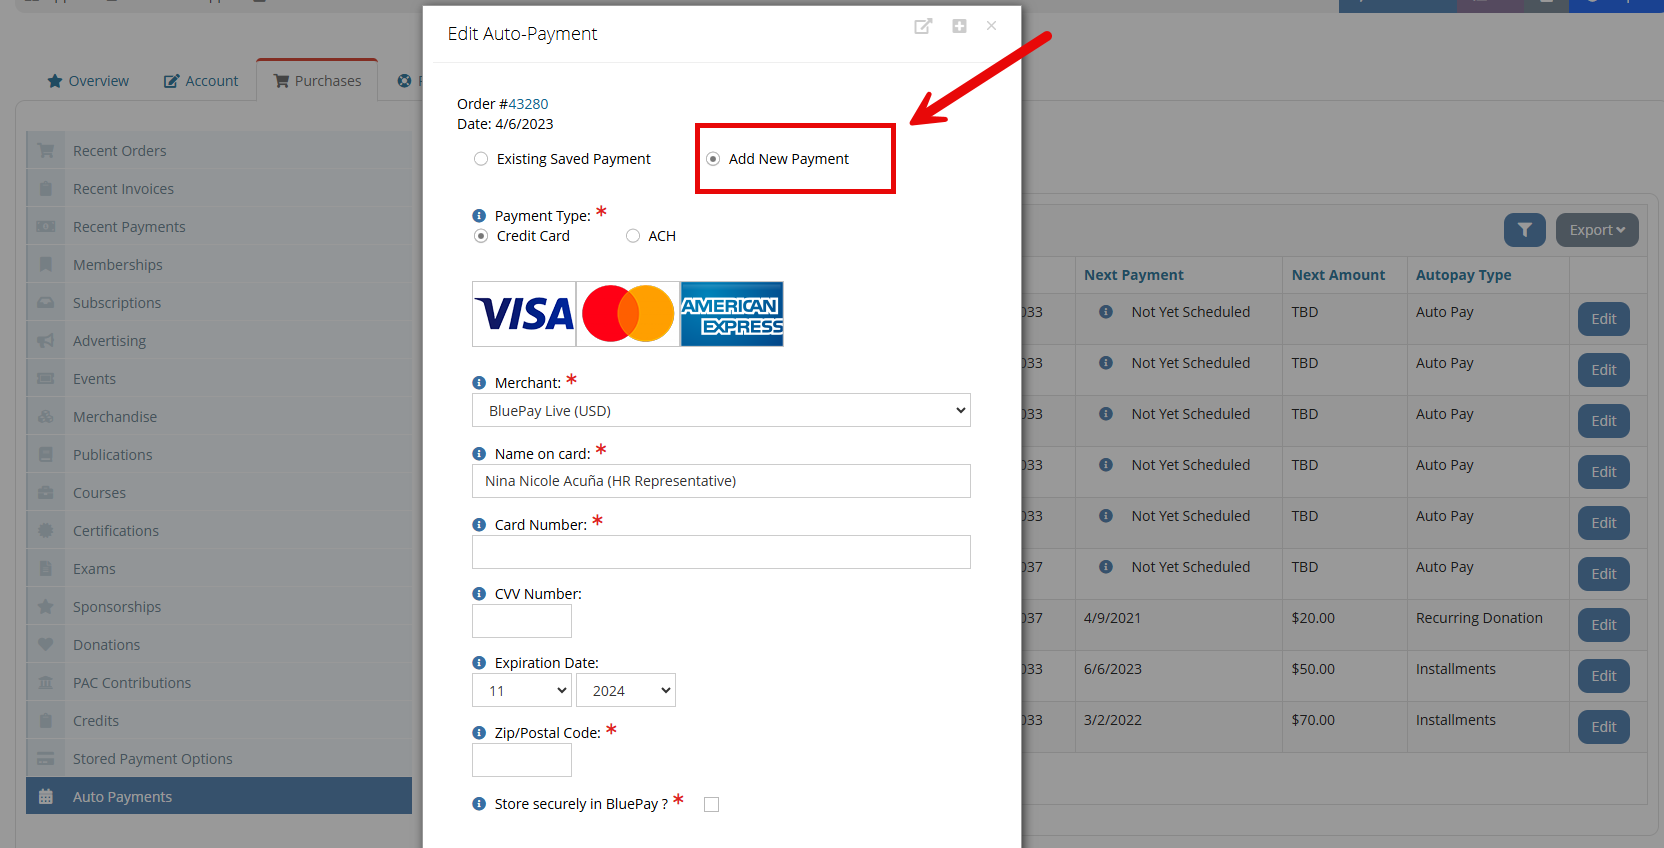
Click Edit next to the item.
-
Select Add New Payment option. The Edit Auto-Payment form will appear.
-
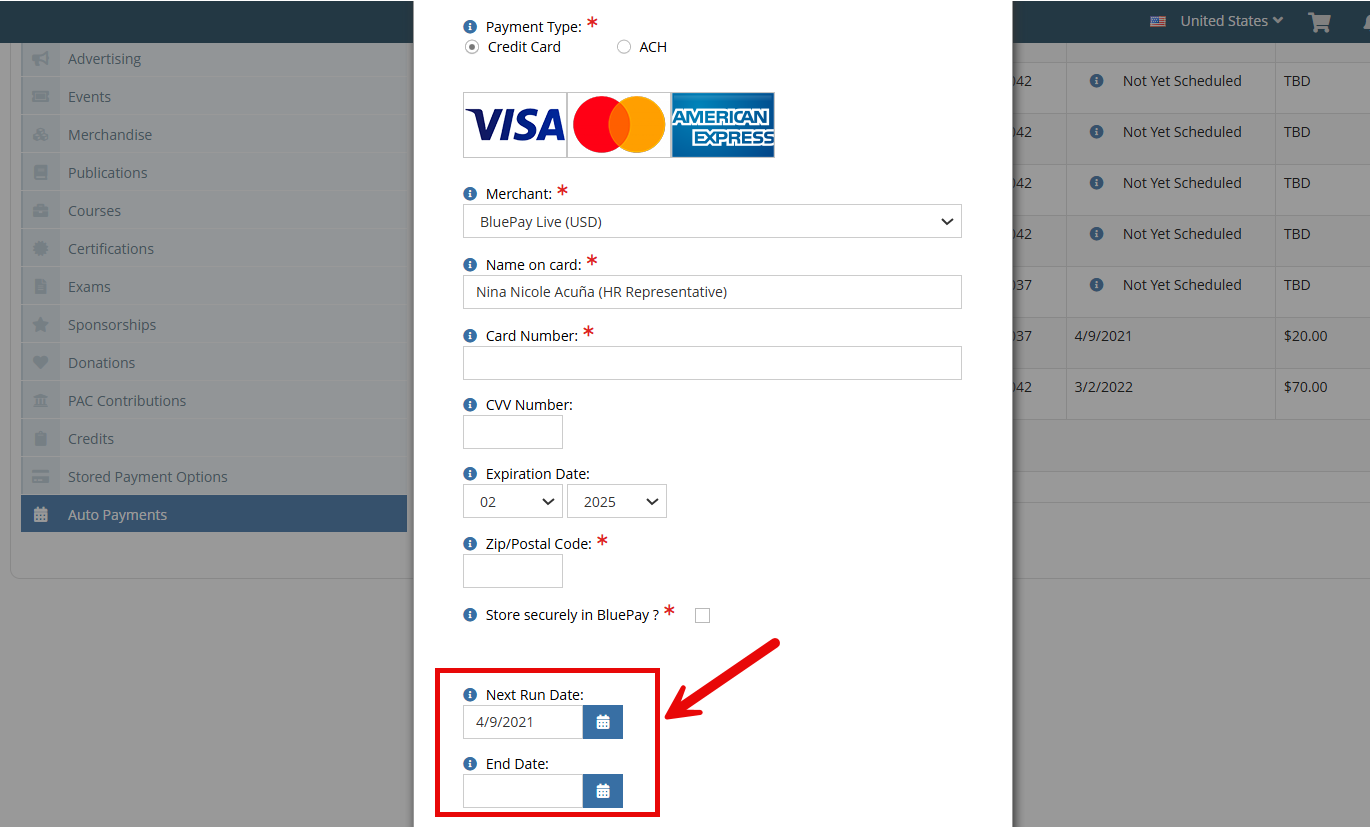
Complete all required fields. See the article, Managing Stored Payment Methods in the Vault for detail on this form.
Note: Both staff and non-staff users can add a new payment method to an existing item set for auto payment. However if adding a new payment method to a recurring donation set as auto pay, only staff can edit the Next Run Date on which the payment should occur and End Date at the bottom of the form.
Editing an Existing Saved Payment
To view the existing saved payment option connected with an auto payment:
-
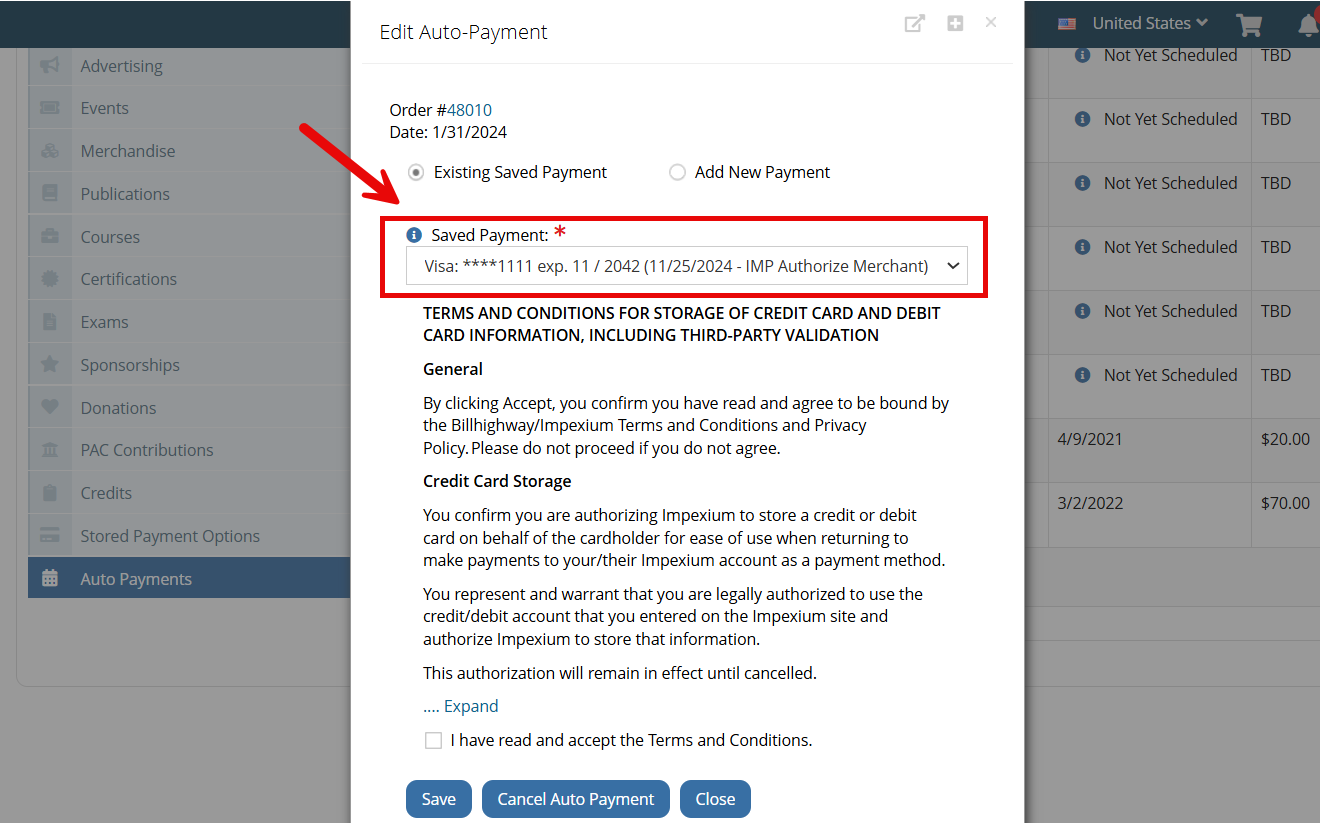
Click Edit next to the item.
-
Select Existing Saved Payment.
-
In the Saved Payment field, note the payment option connected with the auto payment for this order.
Staff and non-staff can edit the existing saved payment, by navigating to the Customer Record > Purchases tab > Stored Payment Options menu option > and clicking Edit next to the Payment Method. Update the information and click Save.
Note: When adding or editing a payment method , the Terms and Conditions check box is standard though custom language can be added to the default message. To include custom language, use the Custom Gateway Terms And Conditions setting > Configuration App. See the Shopping Configuration article.
Canceling an Auto Payment
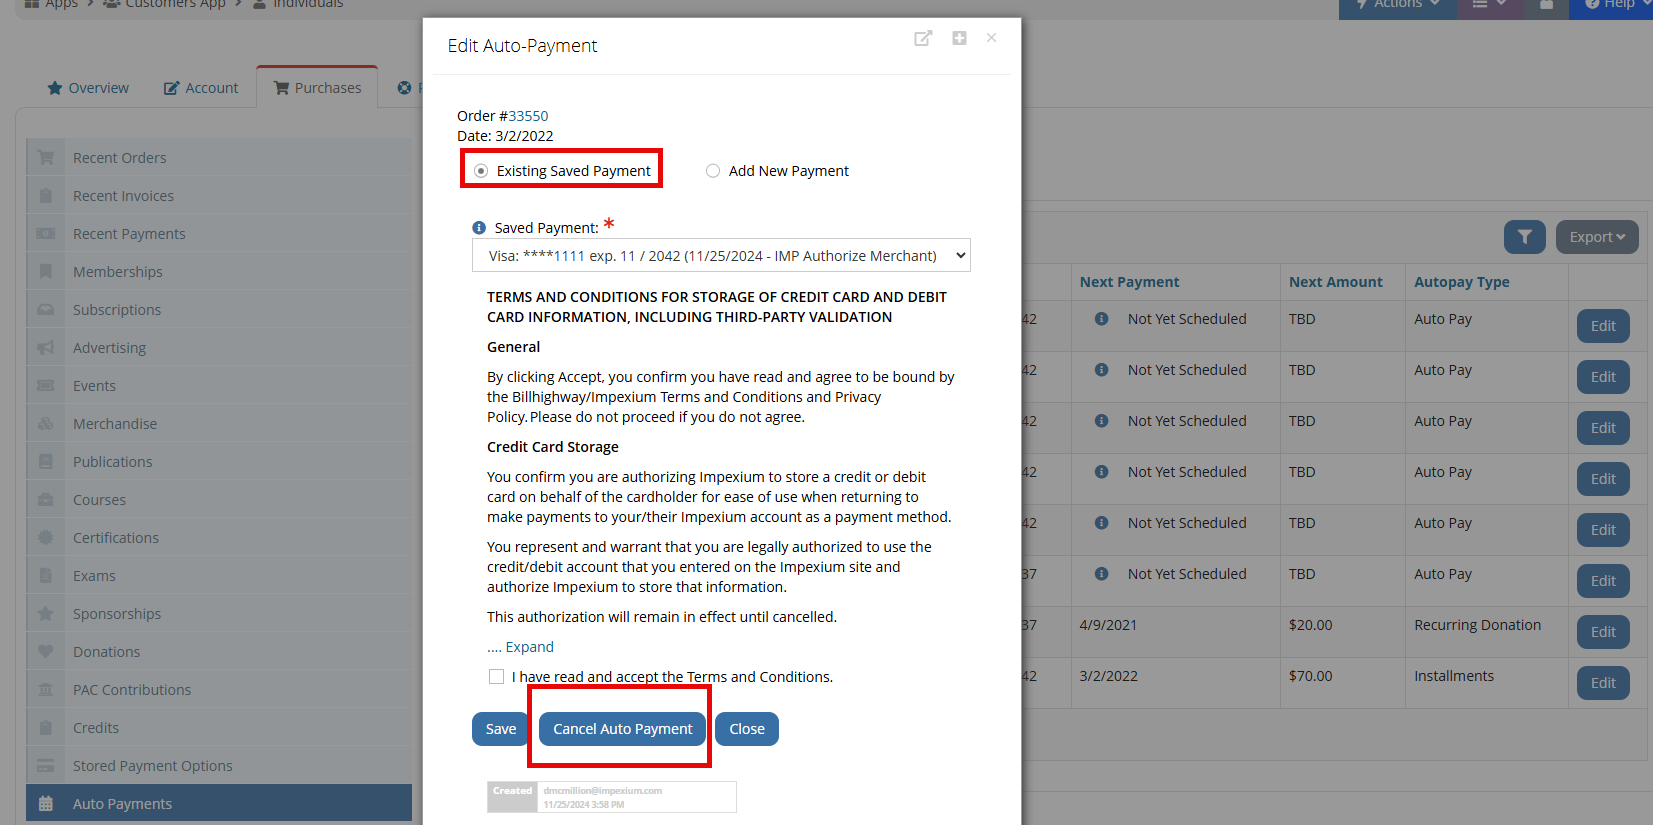
To cancel an automatic payment, click Edit next to the item. In the window that follows, staff and non-staff users can select the Existing Saved Payment option and click Cancel Auto Payment.
Note: When canceling an automatic payment for a recurring donation, the Cancel Auto Payment option will not appear on the Edit Recurring Donation form. To cancel a recurring donation, see the Managing Recurring Donations article.


